
comport365®
End User Documentation Revision 1.3
Last Updated April 19, 2016
This document is meant for end-users of comport365® -users who subscribe to the web-based service provided by Horrigan Resources, Ltd. (“HRL”).
There is 1 calendar owner, 3 levels of access, and add-on audit privileges for users of each customized calendar.
Calendar owner - has all the capabilities of the administrator, in addition to the capability to reassign events from one "owning user" to another. The calendar owner is typically the individual designated to make decisions about the structure of the calendar and the manner in which users are permiited to access the calendar.
Administrator - Admin - users have full control over the calendar. They may add events, edit anyone's existing events and change certain calendar settings.
Normal user - users may add events to this calendar. However, only the user who created the event or a calendar administrator may edit the event. A normal user cannot make changes to another user's events.
View only - users may view any event in this calendar but cannot directly add or change data. They have the capability to submit requests through the calendar to the owner to request that events be added to the calendar.
Auditor - the auditor privilege can be added for any user, regardless of access level. This privilege allows the user to audit stamp any event in the calendar with a permanent audit trail. The audit stamp allows the user to approve or request approval for events, and upon use, will mark the user's credentials, date, time, and comments to any event in the calendar. See below for more information about the audit stamp function.
1. Overview
comport365® is a planning tool, similar in functionality to other calendar web applications such as Google Calendar and Yahoo! Calendar. However, it has been custom tailored by HRL for tasks related to regulatory compliance for investment advisers and broker-dealers.
2. Backup and Data Storage Specification
Before using comport365®, companies should be aware of how data is stored, secured, and backed up in comport365®. All access to the application is restricted by login and password, while end-users are restricted to their company calendar(s). HRL has full access to the system. Text and other data you enter in “Events” or elsewhere are stored in a secured database. Attachments (files that you upload and attach to events) are stored in a secured web directory that can only be accessed via comport365® or by HRL. Back up of the Attachments and Database occurs every week on Friday mornings at 6:00 AM EST.comport365® should not be used as your primary storage area for business documents. You may add additional protection to your attached documents or other files such as password protection.
3. Technical Support
Direct support is provided by HRL. Please contact HRL for questions and technical issues. You can reach HRL at 724-934-0129. If for any reason, you are unable to reach HRL customer service and you have an immediate need to reach a representative who can help you with your access to the calendar, please contact Andreas Tillman at Ender Technology Corp. at 310-400-0800.
4. Logging in
When given access to comport365®, you received a username and password to login to comport365®. In a web browser (preferably Internet Explorer 6 or higher), navigate to http://comport365.horriganresources.com
Enter your username and password in the fields, and press the Log in button to login. You will automatically be redirected to the first calendar you are able to view. This may take several seconds. If you cannot login, or have forgotten your credentials, contact HRL for assistance.
5. Getting Started
comport365® is a complex web application and it may take users some time to become oriented to all features.
After logging in, you should be in the Month view, identifiable by the single month displayed in the center area. Above that are the view tabs, Day, Week, Month, Year, Events, and Reports.
The Events view allows you to see a large listing of events, and the Reports view allows you to generate a printable report of events in a specified date range. The Reports view functionality of comport365® is described further in this documentation. In the Month display, you should see [+] characters next to each day of the month. This link allows you to add an event on that day. If you do not see these characters, contact HRL as access to your calendar may have loaded incorrectly. You may also see some pre-existing events that have been created. You can hover your mouse over the titles of these events to see their Notes. Click the title of the event to open a summary window. Notice this opens a new window and does not take you away from the month view.
NEW - There is now a new top navigation tab, News. This allows us to communicate with comport365® users without sending out blast emails, etc. The title of this tab will be "News - Last Update DD/MM/YYYY where the date is the date of the newest news article. If the title of the tab is "News," then there are no articles at that time.
|
Keep in mind that the Search Events feature keys off the title of the event and the text that is retained in the "Notes" section of the event. It is recommended that users type in the full name of the Event in order to retrieve the Event using the Search Events feature, but the system is often capable of working with partial event titles as well. There are 2 new filters available on comport365®. You will find these new filters on the left navigation bar of the Day / Week / Month /Year / Events tabs. The User Filter allows you to select one user and show only his/her events on the screen. The default setting is “All” which shows all events for all users firm-wide. The Event Status filter allows users to select Open or Closed events to show on the screen. The default setting is “All” which shows all events (both Open and Closed). Both filters have been added for greater efficiency in identifying open tasks by user. Be sure to reset to “All” to see all tasks firm-wide. At the bottom of the screen is a set of navigation links that allow you to access various other areas of the tool.
From left to right: View: Clicking the icon toggles the left navigation on or off. Customer Service: Links you to the appropriate area on horriganresources.com to submit requests for assistance and other inquiries. For prompt service, please make sure to include important details such as your username, email address, and telephone number when submitting an email request for assistance. Documentation: Links to this documentation. Compliance Manual: This link appears if you have submitted a URL to your compliance manual to us and it has been set for your Planner. Home: Returns you to the default month view of the presently selected calendar. 6. Adding Events Depending on the current view, you start to add events by clicking on the applicable date/time or the [+] characters next to it. Notice that you cannot add events in Year, Events, or Reports view mode. This action will take you to the New Event screen. At the top, you will see four tabs underneath Save and Close, and Cancel buttons. These buttons also appear at the bottom of the screen. Pressing the Save and Close button will save your event as is and go back to the view you were using previously. Pressing the Cancel button will return you to the view without creating an event. Clicking through the various tabs will change what you see, but changes you have made to other tabs will be retained. Following are the four tabs and the fields and options that are in those tabs. General tab Calendar: The calendar to which you are adding this event. Title: The title of the event. Category: A dropdown menu of all the categories in your calendar. You may leave it as (None) if there is no applicable category. Status: A general indication of whether this compliance event is completed or not. Open or Closed. Risk Rating: A rating of the risk of the compliance event. Choose from No Rating, Low, Medium, or High. In the Summary Report statistics, you can see how many events you have of each risk rating. Due Date: The date this event occurs. Notice that the indicated weekday changes as you change the date. You can click the calendar icon to pick a date out of a mini-calendar. The Check for Conflicts button has been disabled intentionally. Time: This may be restricted to "all day" for certain users. Completion Date: The date the event is actually completed (this field is optional). Responsible Party Name: The name of the responsible party for this compliance event. Responsible Party Email: The contact email for the responsible party. Notes,Compliance Rationale, Enterprise Compliance Policy,Results,Recommendations / Follow-up: Rich text fields that you can edit using the various icons and dropdowns. You can paste text from external documents but some formatting may be lost. It may be helpful to first paste text from another document into notepad and then paste into the tool to avoid certain spacing issues which may arise during the cut and paste process. Flag: Check the box and the event will be flagged, coloring it to stand out when listing events. Icon: Clicking Browse allows you to select an Icon to display next to this event. Clicking None removes any existing Icon. Repeating tab None: This indicates that the event is not scheduled to repeat automatically. Simple: This shows the simple repetition area. You can have the event repeat every x number of days/weeks/months/years, or you can repeat on a certain weekday, or on a certain week of every x months. Notice that you can specify 12/24 months to restrict yearly repetition to a specific weekday (or just to avoid weekends). You can also select to have the event never stop repeating, stop after a certain date, or stop after a certain number of occurrences. You can also exclude specific dates. Advanced: This displays the advanced repetition area, which permits advanced users to select from a multitude of ways to have events repeat. Location tab This tab allows users to set a location for an event. The fields in this tab are self-explanatory. Attachments tab There are three numbered fields with Browse buttons next to them. Press the Browse button to open a dialog box to select a file on your computer to upload. You can upload more attachments later by editing the event. Document References: Rich text field that you can edit using the various icons and dropdowns. You can paste text from external documents but some formatting may be lost. This field is for referencing documents that you do not wish to attach, but may be located or can be accessed elsewhere. You can also add URL Attachments. Enter a valid URL and then click Update Attachments. These links will show up with your other attachments. 7. Viewing and Editing Events To view an event, click its title in the current view. Recall that you cannot view or edit events from the Reports view or the Year view. 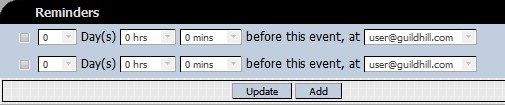 There are two lines of fields, representing two separate reminders. The checkbox on the left turns on the reminder when checked. You set the amount of time before you want the reminder to be emailed, and click Update to save changes. Notice that your email address is the only option for the reminders by default. You can change your email address(es) on the Options page. Press the Add button and another window will pop up. You can enter usernames or normal names (or parts of them) to search for users to add to the Reminders list. This adds another line in the Reminders section with their full name. The reminder for that user will be sent to their primary email address. Remember that you have to press the Update button to save your changes to the Reminders section. The buttons at the bottom allow you to Edit the event, Delete it (with confirmation), and Close the window. For users with proper access permissions, pressing Edit opens the Edit Event screen, which is different from the New Event screen in some ways. Notice the new area on the bottom and top right. This selection affects events that repeat. Notice that it defaults to this date only, which means that the edited event will be an override event. When you save your changes, comport365® preserves the normal repeating event, while overriding the instance you edited with a technically new event. If you select all dates, it will change all instances (occurrences of the event on a specific date) of the event, future and past, except any override events, which are no longer considered the same event as the normal one by the system. Override events will be indicated in the Repeating section of the event summary. Most other parts of the Edit Event screen are the same as in New Event, except that when uploading attachments you have to press the Update Attachments button, or the selected files will not upload. As with adding events, you can now quickly save you changes with the Save button, or Save and Close the event, which was the previous behavior of the Save button. (Also note that adding an Event Request has not changed, and you can only click the Next button to Save and submit the Request.) At the bottom of the general section, you will see an Event Link field with a link titled “Permanent Link to this Event.” If you receive an email reminder, this link allows you to open the event in a web browser. In addition, notice the name of the Planner this event is part of which appears in small font below the Event title at the top. This links to the Month view of the calendar, allowing you to return to the standard view from the Event full screen view that appears if you use the Event Link from an email. The permanent event link has been enhanced so when you use it, you will get a Close button that allows you to go back to the calendar view. This enables users to more easily manage events via email. For example, you can receive an email reminder, and click the Permanent Event Link. You will be prompted to login, but after logging in you will be redirected to the event and then review, audit stamp, or edit the event, and then continue working in your compliance planner. 8. Quick Add Event Below the calendar in the Day, Week, Month, Year, and Events view (Not Reports view), there is a feature called Quick Add Event. This allows the user to conveniently add an event to the calendar without moving away from the current view. Simply pull down the Category menu and select the category to match the new event to be created. If there is no category, the default will be "none." Add the title of the new event, select the date to schedule the event, and hit the Add button. The event will be added as requested, while the user will remain in the current view of the calendar. At any time, the user can go to the new event by scrolling through the calendar, or using the GoTo or Search functions in order to add more detail to the event as necessary. 9. Pre-Population of Notes and Compliance Rationale As part of the subscription service for certain users, your Planner may be pre-populated with certain compliance guidance for global categories which drive compliance events. The "Compliance Rationale" link (visible on the Edit event screen) offers an explanation of the regulatory intent of relevant rules and offers a summary of issues to be considered when reviewing events in a particular category. For example, the "Compliance Rationale" of Advisory Fees may say: "SEC Rules 205-1 and 205-3 of the Advisers Act prescribe the manner in which a registered adviser may charge clients for advisory services, as follows:
Text can be entered in the Compliance Rationale section at any time. 9. Auditing Auditing features represent separate capabilities within comport365®. Auditing allows compliance officers and other authorized employees to create an audit trail of compliance events. comport365®only allows explicitly authorized Planner members to make audit stamps on events. You make audit stamps in the Event Summary view rather than the edit event view. This is because organizations may require “reviewer” type accounts that cannot edit event contents, but can make audit stamps. If you are a Planner administrator, you can authorize Auditors in the Members tab of the Planner section. Contact HRL for assistance when you are setting up Auditing. Auditors will see a new section in the Event Summary View pictured below.  To make an audit stamp, the auditor selects a stamp type, optionally enters a comment, and then presses the Stamp button. There are five stamp types: (1) Approve: This indicates the auditor approves the compliance event contents. (2) Request Approval: This indicates a compliance event is in need of review and subsequent approval. After making this stamp, a typical action would be to mail it to another Planner member for review. (3) Approve, Re-Request Approval: This option makes two stamps, one Approve stamp, and one Request Approval. This can be useful when a compliance event requires multiple levels of approval. (4) Reviewed: This indicates someone reviewed this compliance event without explicitly approving it or denying approval. (5) Deny Approval: This stamp type only appears when the Audit Status (explained below) is Pending Approval. It indicates that approval has been denied. An event can have an unlimited number of audit stamps.When an event has one or more audit stamps, two fields appear below Status in all views of the event, including Event Summary, Edit Event, and in Reports.  Audit Status is a special field because users cannot directly change it. Instead, comport365® determines the Audit Status based on the Audit Trail. Following are the possible audit statuses and the specific audit history that can make them occur:
o Unapproved: Either the newest audit stamp is Deny Approval, or the only audit stamp(s) are Reviewed. o Approved: The newest audit stamp is Approved. o Pending Approval: The newest audit stamp is a Request for Approval. - Note that Reviewed stamps do not affect the Audit Status except to make the Audit Status and Audit Trail appear when there are no other stamp types in the Audit Trail. For example, let's say that on Jan 1st an audit stamp is made of type Request for Approval. On Jan 2nd, a Reviewed audit stamp is made. The event Audit Status would still be Pending Approval. - Audit Trail: This field shows all the stamps that have been made on an event. Each stamp contains the stamp type, the date and time of the stamp, the name of the user who made the request, and the comment if any. Stamps appear in a small font in Event Summary and Event Edit views but appear normally in Reports. 10. Reports View Users can avail themselves of several summary reports to assist in the management of their compliance programs. There are 6 reports in total, 5 found in the Reports tab, and 1 in the Events tab. There are 4 reports accessible from the Reports tab: (1) Master Event List - creates a list of all events during the designated time period. (2) Compliance Follow-up Report - creates a report showing all events during the period where there is a notation in the Follow-up field that requires compliance follow-up. (3) Past due Events - creates a list of all Open events that appear on the calendar prior to today's date. (4) Compliance Program Review Report - creates a template summary compliance report capturing all topics reviewed during the designated period, and highlights any event that users have flagged denoting a deficiency or vulnerability discovered during the review process. (5) Custom Report - here the user has multiple options for running reports - see instructions on the custom report page. (6) There is also a new Compliance Test Report available on the Events tab. Simply click on the View Report link next to any listed event which will create a summary report of the information contained in the event. All 5 new reports can be exported to word where the user can further refine and modify the data to fit the unique needs of the recipient. The Reports view allows users to compile a printable report of events in a specified date range. It also allows users to download a zip file of all the attachments in all the events in the report. Access this view from the top navigation bar, and select a date range. Notice that the dates are the “start” of that day, not the very end, so to print a report for one day you would want the End Date to be the next day, and the Start Date to be the previous day. Reports are capable of filtering out events that do not meet certain criteria. For example, you could make a report for a specified month that only contained events that had Closed Status, Approved Audit Status, and contained “annual” in the event title. You can also filter by the presence of one of the text fields (for example, remove events from the report that did not have a Compliance Rationale). You can also use a Summary Report mode that excludes some information from each event and adds a statistical section at the top. The documentation that appears in the Reports View explains how to use these filters in full detail. The report displays some header information in the Generated Report before the events: User: The user who generated the report. Another important note is that the report will only show immediate events. This means that future instances of events will not be displayed. For example, let’s say you have an event that starts August 1st, 2007, and repeats every year on the first Wednesday of the month. Reports will display the start date instance (August 1st, 2007), and the next instance (which would be August 6th, 2008), but no further instances will be displayed, and it will only display one instance of an event in a single report. Notice that the next instance changes when the current date passes a present next date. This caveat does not apply to override events, which are considered separate events. This is important because the typical usage of the system is to start with a set of repeating compliance events, and override them to enter organization-specific compliance information. Thus, the typical report will be comprised of override events. Once you select a date range and press Generate Report, you will be able to print the report from your browser or save it as a Word document, as well as download all attachments (if there are any) by clicking the link at the very bottom. You can also download individual attachments or a zip of attachments in an event (if there are multiple attachments). This allows you to make a rudimentary backup of your work in comport365®. Once you save a Report, you can edit it manually to remove unnecessary information such as override event status, etc. 12. Documents Users can now set up a document library on their site. The Documents Tab is available to upload and store compliance program documents, such as the Compliance Manual, Code of Ethics, Risk Matrix, and employee certification forms. Follow the Documents Tab where users can upload up to 3 documents at a time. First, click on "Add Document." The screen will present the option to upload up to 3 documents from your browser. Click "Browse" to select the document(s) you wish to upload in each browser box and click "Save". There is no limit to the number of documents you can upload to your site. 13. Frequently Asked Questions We have recently changed the attachment limitation to allow users to upload files up to 20Mb (Megabytes). However, this is limited by the timeout restriction. If your browser does not complete the file upload in a certain amount of time, usually 1 or 2 minutes, it will "timeout" and your attachment will not be uploaded. You can try compressing your large attachments with a utility such as WinZip, or splitting documents and other files up to attach them. Make sure to also upload large attachments one at a time. Our testing indicates attachments in size up to 10-12Mb can be uploaded with no timeouts although this may vary, and it also takes quite a while. For very large files, such as videos, we recommend using the Document References field to store where the file is located on your local machine or organization shared drive. 2. Why do I see "Owning User [username] [change button]" on each event when other users do not? This is because you are a Calendar Owner of the calendar that event is associated with, and as such, you are now permitted to change the event owner of events. If your Compliance Planner has Strict Event Security on (on by default), then non-admin users will only be able to edit events they own. 3. How does the audit trail stamp Approved relate to the Event Status (Open/Closed)? The audit stamp allows any user to stamp an event with a comment and note the stage of approval or simply note their review. The Event Status feature is not linked to the audit stamp. This is designed to give the calendar owner, often the CCO, the final determination as to whether an event is fully approved and Closed. So if a user is authorized to approve and close an event, the user can stamp the event as approved (with or without comment) and then change the Event Status from Open to Closed. 4. Using Icons. Icons can be used at the discretion of the calendar owner and/or event owner based on the overall implementation of comport365®. One helpful application is to use the Icons to visually capture the stage of event on the calendar. For example, if an event is closed and there is no further need to actively work in that event, the event owner may select an Icon to mark the event. The Icon is visible in the monthly view, so it is not necessary for users to actually open an event in order to see the Icon. If a visual view of all closed events is preferred, event owners can mark the RED X Icon on the event to show that this event is closed. To add an Icon, simply open an event, hit the edit key, and then scroll down to the bottom of the event, and click BROWSE and a pop-up window will appear with choices of Icons. Select the desired Icon by clicking on it and it will immediately be applied. Click None to remove the Icon from the event. 5. Using Permanent Event Link Feature. The Permanent Event Link feature allows you to link to an event by link through an email notification. If you have been reminded of an event on the calendar via email, the event link appears in the body of the email (marked Permanent Event Link). Simply click on this link, and you will be directed to the log-in page of the calendar (if you are not already signed on the calendar in another window on your computer). Upon logging in, you will be taken directly to the Event screen of the event which was the subject of the email reminder. If you wish to edit the event, do so, simply hit save and close, and you will be redirected to the monthly vew of the calendar. Additionally, this Permanent Event Link can be cut and paste into other events or email communications for easy reference by any user with access to the calendar in which the event is scheduled. Anytime the user clicks on this event link, they will be directed to the log-in screen and upon logging in, will be taken directly to the event. 6. Retrieving Compliance Rationale. Each category found in the category menu of the calendar is tied to a Compliance Rationale link (found to the left of the second text box on the New Event or Edit Event screen). In order to activate the link for a given category, users must first select the category for the event, title the event, and hit the SAVE and CLOSE button on the top left portion of the page. For example, if you are creating a Best Execution event on the calendar, simply (1) select the "+" icon on today's date in the Month View and a New Event screen will load; (2) select "Best Execution" from the dropdown category menu; (3) give your event a title, such as "Best Execution Monthly Test" and hit SAVE and CLOSE; (4) Reopen the event and scroll down to Compliance Rationale and click on the link that says"Current Compliance Rationale (HRL)" and the rule citation and other regulatory guidance will appear in a pop-up window. After an event has been created, in order to go back and review the Compliance Rationale at a future date, simply Click on the event, hit Edit, and then Click on the "Current Compliance Rationale (HRL)" link and the pop-up window will appear with the information. In summary, the event category must be selected and saved before the system can load up the Compliance Rationale tied to the category topic. Each time you hit the link, the most current Compliance Rationale will load so that the most current rule guidance is at your fingertips. 7. Importing and exporting events. Calendar Level - Export from comport365 to Outlook (reserved for calendar owners) ------------------------------------------- ------------------------------------------- 8. Using the Calendar Notification Feature The NOTIFICATION feature allows a user to receive email reminders anytime a change is made to the calendar (initiated by any user). Here are the step-by-step instructions for enabling this feature: Step 1 – Select OPTIONS on the bottom navigation bar of the Month View. Step 2 – Select NOTIFICATIONS Tab Step 3 – Select ADDStep 4 – In the pop-up window, Type in the name of your calendar (which is generally the name of your company) and Select SEARCH and hit ENTER; When your company's calendar name appears in the window, Select ADD Step 5 – Next to the calendar selection, Select EDIT Step 6 – In the pop-up window, Select from the Category drop down menu the CATEGORY for which you want to receive email notifications and Select SAVE Repeat Steps 2-6 if you want to receive notifications for an additional category. Alternatively, the user can select "ALL" in the Category drop down menu, which triggers an email anytime a user makes a change to an event, or adds an event in any category. 9. Changing the repetition parameters of a repeating event Users may need to change some feature of a repeating event. For example, let's say the user is interested in moving a repeating weekly event from Fridays to Mondays. Here is an example of how to go about making the change: (1) Go to the next event in the sequence set for Fridays that has not yet been touched. Go to edit, go to the repeating tab and change the bottom selection from "no end date" to "until" and specify the date of the event you are working in. Save changes For all dates. So for example, go into the 12/27/13 repeating event, hit edit, go to the repeating tab and uncheck the "no end date" box and click on the "until" box and specify December 27 2013. (2) Then start a new event beginning on the following Monday and start a new weekly event version to repeat on Mondays with no end date. (3) If you have any questions about this process, or if you would like Customer Service to manage the change for you, please let us know. Last updated April 19, 2016 |
